
Today, we’re breaking down how to add images in WordPress and reduce their file size (to keep your pages & posts loading as quickly as possible).
When you’re just learning the fundamentals of how to start a blog, there’s a lot to figure out, I get it. We’ve talked about how to change font size, changing font color, making a clickable link and so much more here.
The good news is that in 2023, it’s very easy to learn how to add images in WordPress with all of the usability updates and enhancements they’ve seen over the past decade.
In this quick tutorial, I’ll be showing you how to add images in WordPress posts, both in the Classic Editor (which I prefer using) and through their newer Gutenberg Editor.
Now, let’s dive into adding images to your WordPress posts—while also reducing their file size as much as possible, to stay in line with SEO best practices and to keep your pages loading as fast as possible.
How to Add Images WordPress (and Reduce File Size) in 2023
- Adding Images to Posts in the Classic WordPress Editor
- Adding Images to Posts in the Gutenberg WordPress Editor
- Adding a Featured Image to a Post in WordPress
Now quickly, before we dive into this tutorial on adding images to WordPress, I’ll show you how to reduce an image’s file size (helping your posts load faster) in 2 easy steps.
Install the (Free) Compress JPEG & PNG Images Plugin by Tiny PNG
You can download the free Compress JPEG & PNG Images Plugin for WordPress right here from the WordPress plugin library.
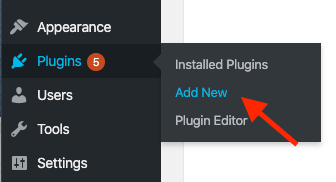
Alternatively, you can also search for the plugin and install it from directly inside your plugin menu, accessible on the left-hand side of your blog admin section here—or check out this quick tutorial on how to install a WordPress plugin:
Once you’ve installed the Compress JPEG & PNG Images Plugin, every new image you upload to your WordPress blog will be automatically optimized and the file size reduced as much as possible without compromising the quality of your image.
Note: This is the best image compression plugin on the market by far. It allows up to 500 free image compressions per month (which is much more than you’ll likely need) before having to upgrade to a paid plan at $.009/image beyond your first 500 each month. It’s a serious bargain and you won’t find a better compression plugin that gives you more free credits.
However, if you want to do image compression directly on your own computer (unlimited for free), then I recommend the ImageOptim application.
Upload Your Images
That’s it! Seriously, it’s that easy.
Once you’ve installed the compression plugin on your blog—or have compressed individual images on your computer first—you’re ready to upload them to your posts or pages in WordPress.
Now, let’s dig into exactly how to add images to WordPress.
1. Adding Images to Posts in the Classic WordPress Editor
If you’re like me and still prefer the Classic WordPress Editor layout for adding/editing your posts, then follow along here.
On the other hand, if you’re using the newer Gutenberg Editor for your post content, then jump down to the next section for that walkthrough. If you’re not sure which editor you’re using, take a peek at the image screenshots below here and compare them to what your editor looks like. Want to use the Classic Editor, but not sure how to get it? Take 2 minutes to install the Classic Editor on your WordPress blog if you want to go that route.
1. Open the Post You’re Adding Images to (and Find the Right Spot)
First, you’ll need to make sure you’re inside the Post you want to add an image to.
Then you’ll want to navigate your cursor to the exact place within your post that you want to add the image.
2. Click the “Add Media” Button at the Top of Your Editor
That button will look like this right here:
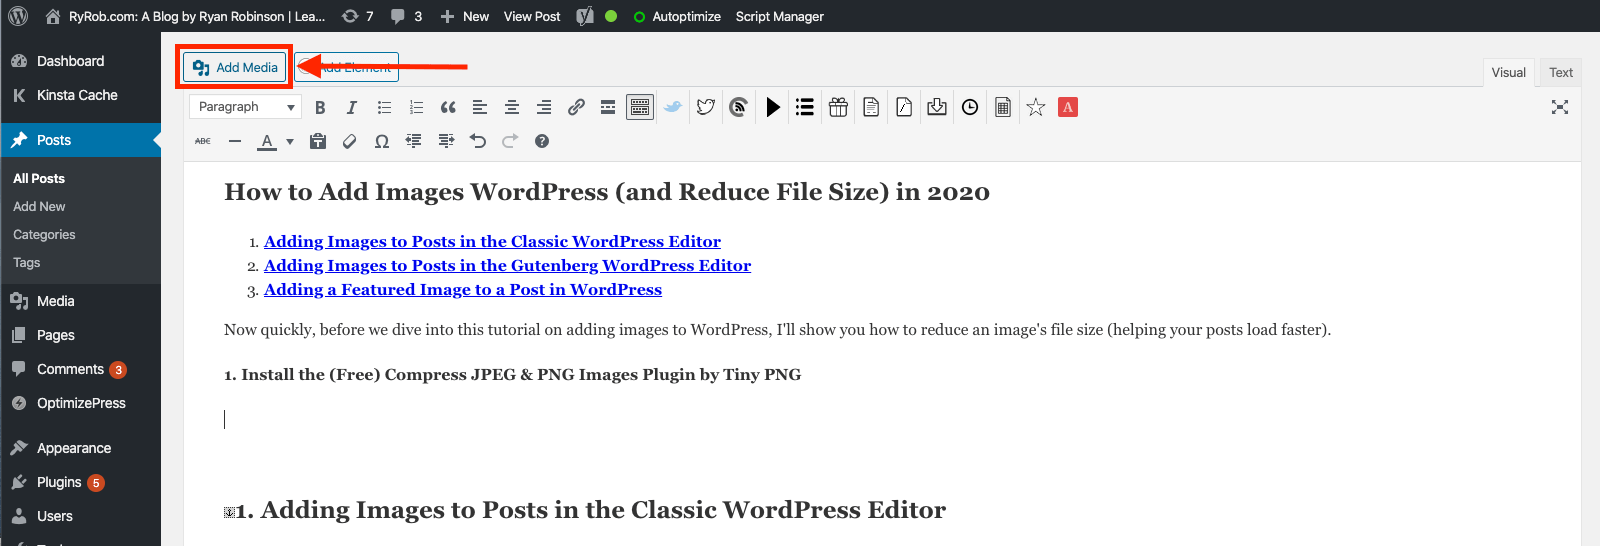
Once you click the “Add Media” button, you’ll be presented with the screen where you can upload your image file.
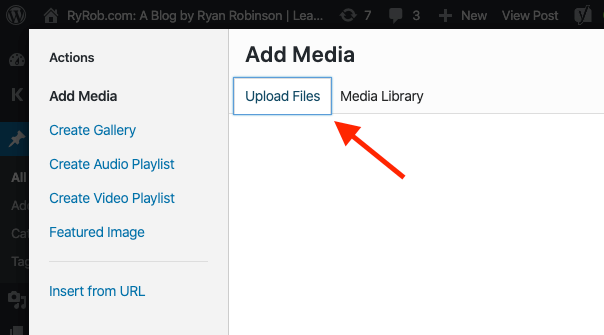
3. Click “Upload Files”
Click on the tab for “Upload Files” and you’ll be taken to the screen where you can use the selector tool to pick an image file from where it’s located on your computer.
Alternatively, if you’ll be dragging an image file from your desktop and uploading it—you can skip the “Upload Files” screen and just move straight to dragging the image in and dropping it (there’s a demo of this in the next step).
4. Upload Your Image File
I prefer dragging image files from my desktop and dropping them into the file uploader (rather than using the selector to locate them on my computer), as it’s much quicker.
Here’s a quick video/GIF demonstration of how to add an image from your desktop into WordPress:
Once you’ve uploaded your image, the compression plugin will work it’s magic to help reduce the file size (behind the scenes).
Note: Before finishing up your image options and clicking “Insert into post,” you’ll want to write out an SEO friendly Alt Text for your image—something that describes the nature of what’s taking place in your image, and ideally weaving in one of the target keywords you’re hoping the article will eventually rank for (in organic search results).
5. Select Your Image Options and Click “Insert into post”
Finally, you’ll have a few options to define for your image. This includes:
- Controlling the alignment of how your image appears within your post (I always select Center alignment)
- Making your image link to another page or post on your blog (or an external link you want to direct readers to)
- Display size (I always recommend uploading as full size to avoid a loss in image quality)
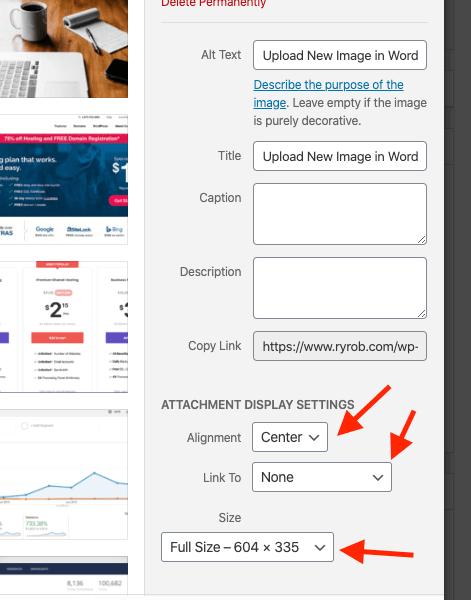
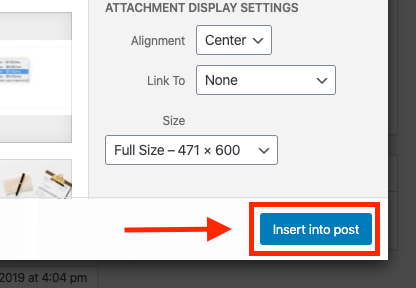
After selecting these options, you’re ready to click “Insert into post” and you’re good to go!
That button will be right here in the bottom right-hand corner of your screen:
Now, you’ll be taken back to your editor window and you’ll see the image you just added sitting right there where you uploaded it.
Keep in mind that you still have some quick & easy editing options if you decide you want to change something with the display of your new image:
- You can resize it manually by grabbing one of the corners and dragging it up or down in size
- You can click down on the center of the image and drag it around within your post to reposition it
- You can always delete the image by clicking “backspace” or “delete” on your keyboard and start over
And that’s it! You’ve learned how to add an image to WordPress with the Classic Editor.
2. Adding Images to Posts in the Gutenberg WordPress Editor
In the Gutenberg WordPress Editor, your post editing options will look a lot different than what you’ll see from the Classic Editor.
Gutenberg takes an approach of adding/editing content through a system of “blocks” like text blocks, header blocks, image blocks and so on. So let’s dive into adding images in Gutenberg.
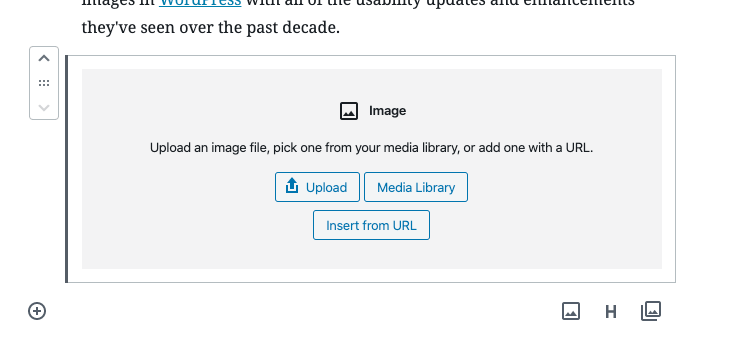
1. Select the “Add Image” Icon
After making sure you’re adding an image in the right location within your post, select the “Add Image” icon. It’ll look like this right here:
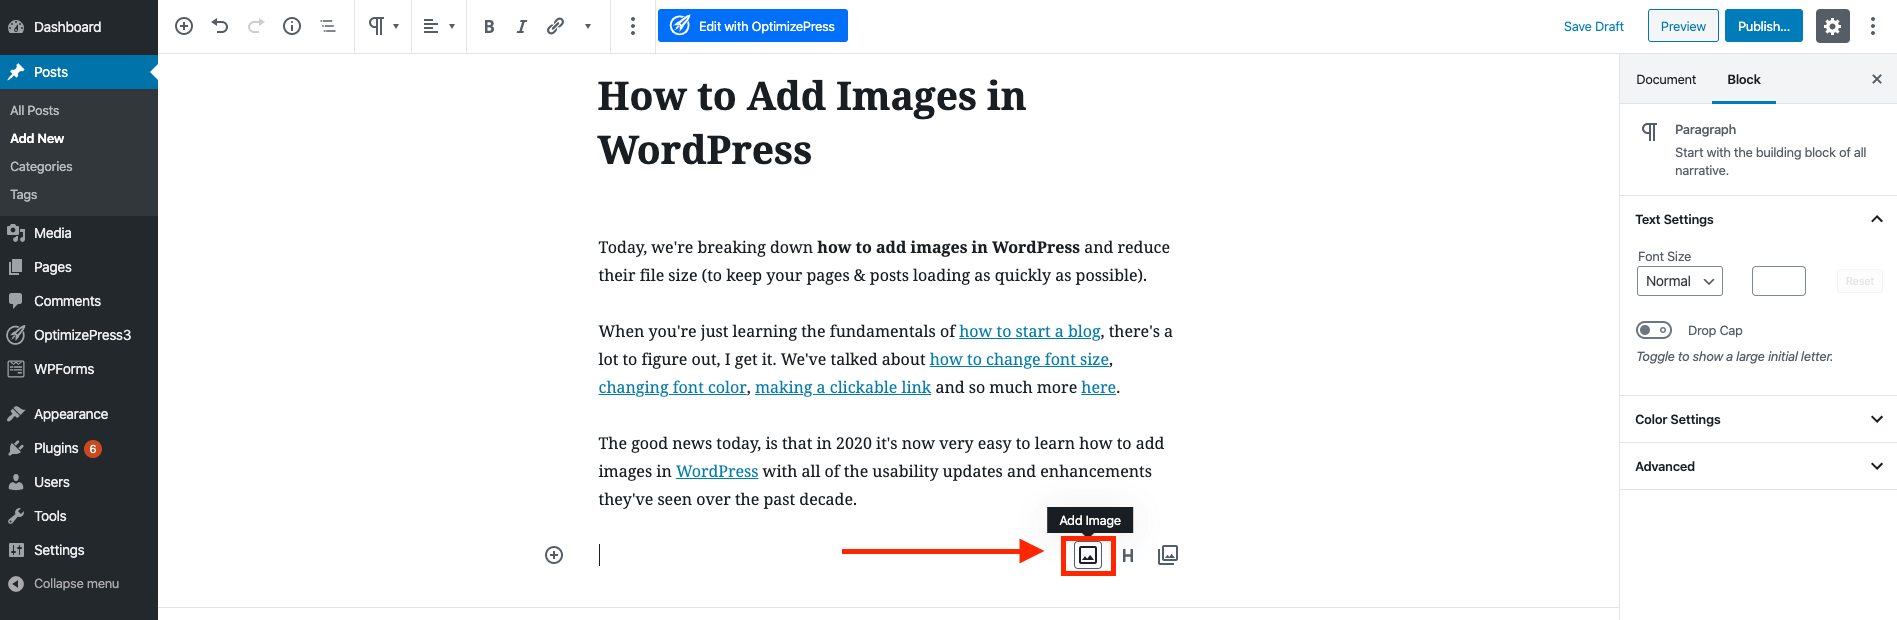
Once you click on the “Add image” icon, you’ll have a few options for how you can add an image to your post.
2. Choose How You’ll Add the Image
In Gutenberg, you’ve got a few quick options for how to add an image in WordPress. That includes:
- Upload (which will open a selector screen that allows you to pick the image file from your computer)
- Media Library (which takes you to your existing library of images—from which you can also drag & drop in an image)
- Insert from URL (if there’s an image located somewhere online that you’d like to import, you can paste in that link here)
Here’s a snapshot of those options (personally, I just click “Upload” and quickly grab the image I want from my desktop):
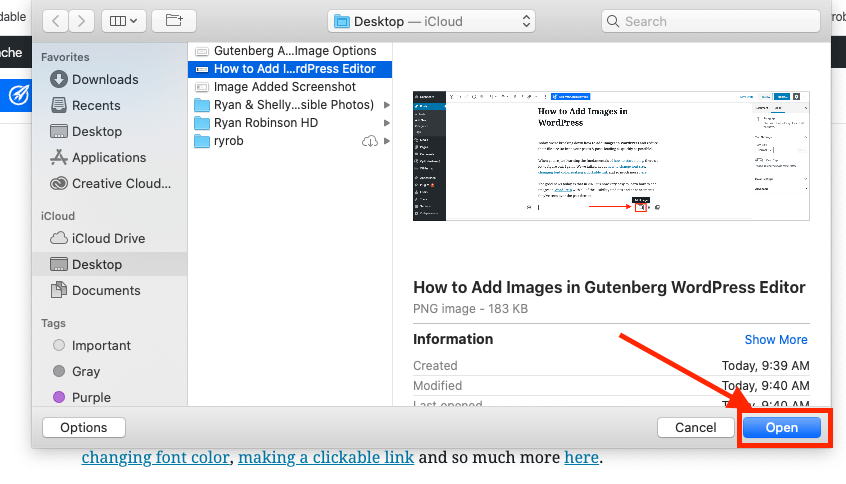
3. Upload Your Image
Once you’ve selected the image you want to upload, just click the “Open” button and it’ll be added into your post.
Now that you’ve added the image, a smaller thumbnail of it will appear as a new block within your post.
Here’s a screenshot of how that’ll look:

4. Image Settings & Quick Editing Options
Before moving on, you’ll want to get your image settings dialed in (as per SEO best practices).
And just like with the Classic Editor, you’ll be able to define a lot of different settings and properties for an image. With Gutenberg, it’s just done a little differently. Your image settings are instead located over on the right sidebar (after first clicking once on the image).
Here’s what those settings look like:

Be sure to define your image settings for at least these two properties:
- Writing SEO-friendly alternative text that describes the image and weaves in a keyword phrase
- Image size (I always display images as full size to avoid a loss in quality)
You can also click into the “Style” settings to add some more nuanced styling & built-in cropping features with Gutenberg.
5. Moving Images Around Within a Post via Gutenberg
One very cool side effect of the Gutenberg editor’s focus around using “blocks” of content, is how easily you can move your images (or any content blocks for that matter) around within a post.
After clicking once on the image you want to rearrange within your post—you’ll see “up” and “down” arrows appear right next to the image.
Click on those arrows to move your image up or down inside of your post, like so:
And that’s it! You’re good to go.
You’ve now learned how to add an image to WordPress in the Gutenberg Editor as well 🙂
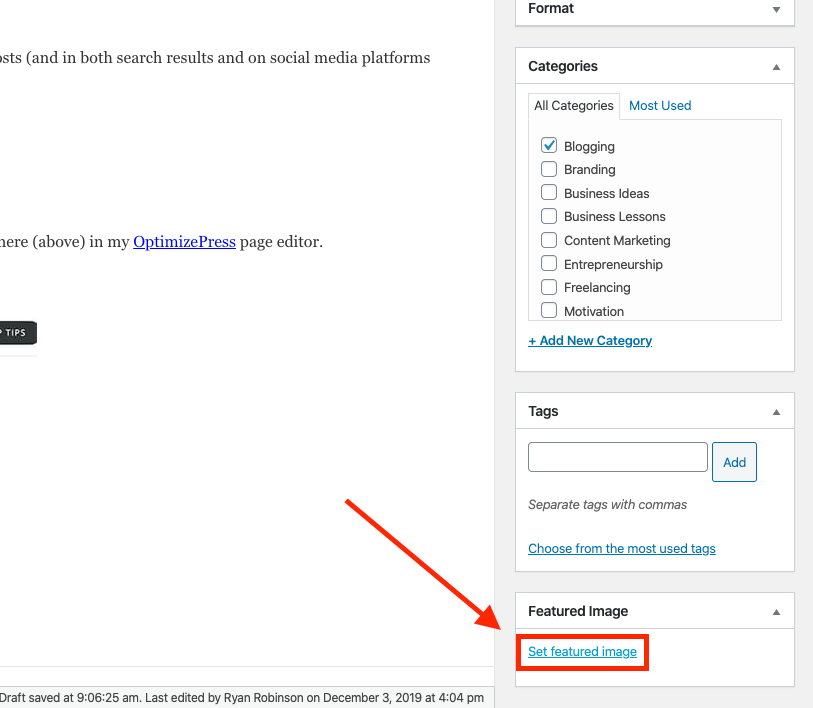
3. Adding a Featured Image to a Post in WordPress
Featured images are essential in a WordPress blog—because they’re the images that get displayed at the top of your blog posts (and in both search results and on social media platforms when your content gets shared).
Last but not least, here’s how to add a featured image to a post (or page) in WordPress.
Near the bottom right of your WordPress Editor window, you’ll see a section for adding a featured image. Click on “Set featured image” and you’ll be taken to the standard image upload screen where you can add in the image you want to be featured at the top of your post (also in search results and on social platforms).
After you’ve uploaded the image you want to use and clicked “Set featured image,” you’ll be taken back to your editor screen and you’ll see a small thumbnail of the image being displayed in the bottom right (to confirm you added the right image) like so:
Pretty simple, right?
If you selected the wrong image (or want to make changes later), you can simply click on the “Remove featured image” text and you’ll have the opportunity to select or upload a different image to be featured in your post.
Final Thoughts on How to Add an Image in WordPress
Adding images to your posts in WordPress doesn’t need to be difficult.
Whether you’re using the Classic Editor or Gutenberg for your blog, the team behind WordPress has worked hard to make adding images a very easy process.
If you’re still having trouble, please drop me a comment at the bottom of this post and I’m happy to help you troubleshoot any issues you’re having.
That’s all for today!
We just covered how to add images in WordPress 👏
Like what you see? Sign up to get more blogging tutorials and advice.
Want More Blogging Tutorials?
Head over and check out my ultimate guide to starting a blog and making money from it this year.
Hi Ryan,
Your article is fantastic. One can classify as an ultimate guide. Nonetheless, you did great. For instance, although the new WordPress editor (Gutenberg) has gain momentum, several bloggers are still using the “classic editor,” they’re more convenient with it. Given this, I like the idea of adding a tutorial on the classic editor as well. So since the material has tutorials for both the new and old WordPress editors, it make your content a remarkable resource for bloggers (especially newbies).
Thanks for sharing!
You’re welcome, Moss! And thank YOU for the kind words—ultimate guide was definitely the goal.
Good idea too… adding a how to on installing the classic editor tutorial to my list of upcoming posts.
Hi Ryan
I do really appreciate your tutors, but I’m new into blogging.
I have open a blog and i don’t know how to publish or post my contents
Pls i need guild.
Thanks
Hey Okah! Thanks for the comment. Head over to my guide about starting a blog and jump down to section #4 about publishing your first post… that’ll walk you through the process: https://www.ryrob.com/how-start-blog/
The methods you show are 100% accurate. Because I upload pictures the same way. And uploading images in this way is good for SEO. Thank you so much for this beautiful article.
You’re welcome, Evelyn! Glad to hear it 🙏
Ryan FYI – your “installing the classic editor” link to yoast.com is broken!
Thanks always for the awesome article! I owe you a response to another comment, will do so soon 🙂
Thanks for the heads up, just fixed that! 🙂
Hey Ryan! Your method is very easy and informative. I read your article in depth and notice different valid points. Thanks for finally sharing this article.